Revel Systems
Before you begin
In order to use the features in this section you need to have an active Spojit account. If you don't have an account you can checkout out the pricing and register here. If you already have an account you can login here.
Revel’s all-in-one cloud based POS is specifically designed for the unique demands of restaurants and bars. This service can facilitate the bilateral transfer of resources within the Revel Systems RESTful web service.
Tip
Full documentation of Revel Systems resources and configuration is available at Revel Systems API Documentation.
Revel Systems Authorization
The following authorization configuration needs to filled out in order to connect with Revel Systems:
| Option | Description | Default | Required |
|---|---|---|---|
| Subdomain | The subdomain of your Revel instance (i.e. https://****.revelup.com). | - | TRUE |
| API Key | A api key for your Revel instance. | - | TRUE |
| API Secret | A api secret for your Revel instance. | - | TRUE |
The following example configuration shows you how to configure the authorziation for Revel:

Important
This service uses the current version of the Revel Systems API and can either use the resources or enterprise route. Please add the paths accordingly:
| Correct | Incorrect |
|---|---|
/resources/Customer/ | /Customer/ |
/enterprise/User/ | /User/ |
Important
- This service has a built in JSON parser and will automatically convert to the proper format. Requests will automatically contain required headers and authorization configuration so they do not need to be added.
- The following (below) is a general guide on how to use the methods for this service. The examples use the JSONPlaceholder fake online REST API. Please refer to the system documentation above for full path and schema information.
GET
When the GET configuration is selected the service will retrieve a resource from a given URL.
| Option | Description | Default | Required |
|---|---|---|---|
| Method | Select "get" to retrieve a resource. | - | TRUE |
| API Url | The full URL of the resource . | - | TRUE |
| Headers | The request headers are not required as a request can be made without them. If added the Header Key and Header Value is required for each. | - | FALSE |
| Header Key | The name of the header key. | - | TRUE |
| Header Value | The value of the header. | - | TRUE |
Example configuration and mapping
The following example shows you how to configure the Rest Service to get data from a resource. It also contains an example header for an OAuth authorization bearer token.

The GET method doesn't require any service data setup.
POST
When the POST configuration is selected the service will create a resource at a given location.
| Option | Description | Default | Required |
|---|---|---|---|
| Method | Select "post" to create a resource. | - | TRUE |
| API Url | The full URL of the resource . | - | TRUE |
| Headers | The request headers are not required as a request can be made without them. If added the Header Key and Header Value is required for each. | - | FALSE |
| Header Key | The name of the header key. | - | TRUE |
| Header Value | The value of the header. | - | TRUE |
Example configuration and mapping
The following example shows you how to configure the Rest Service to create a resource.

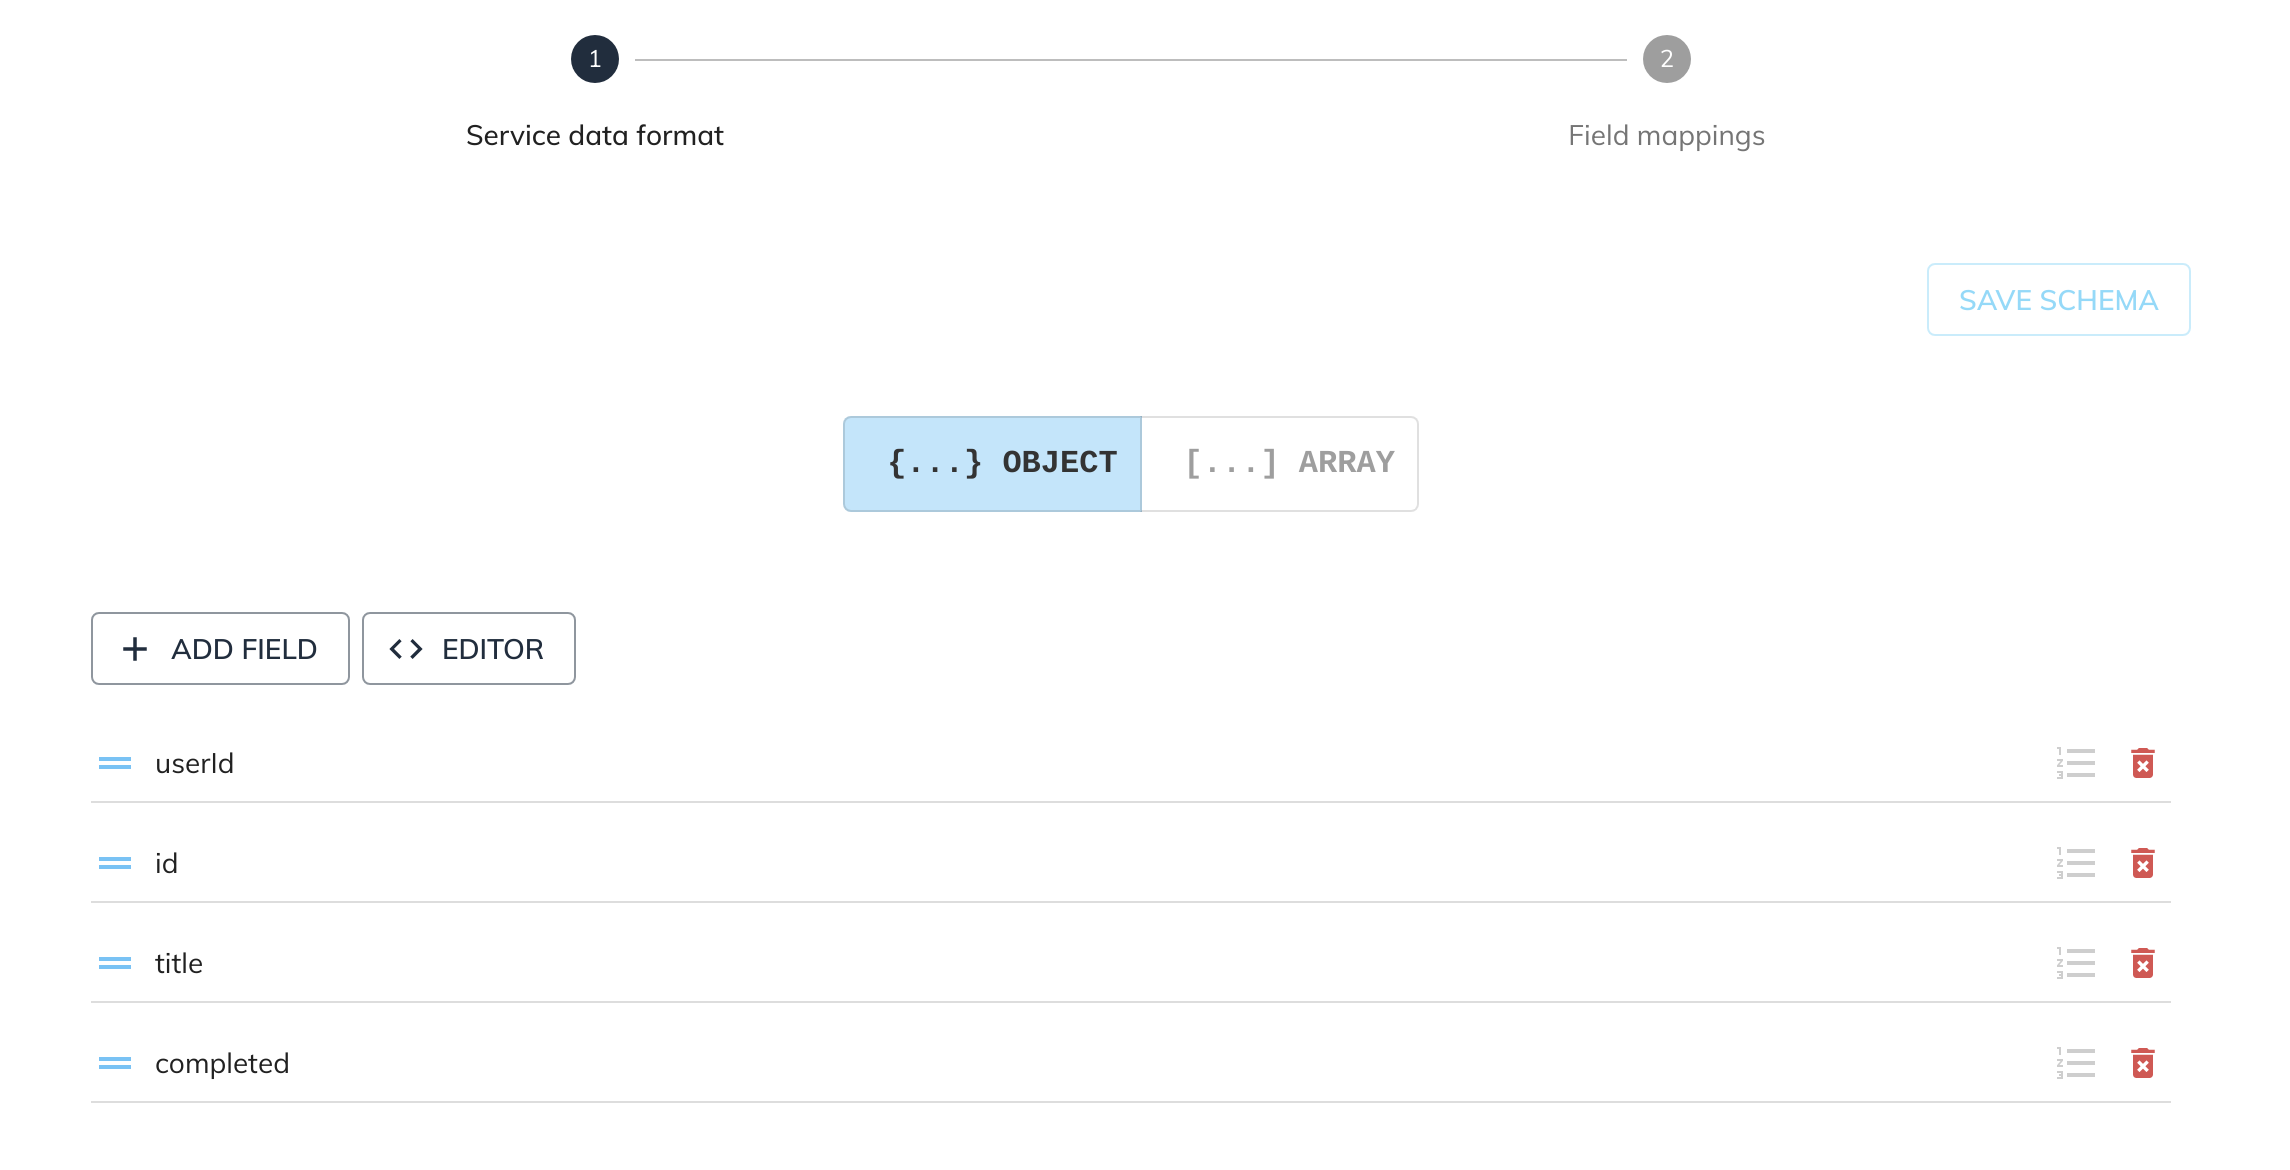
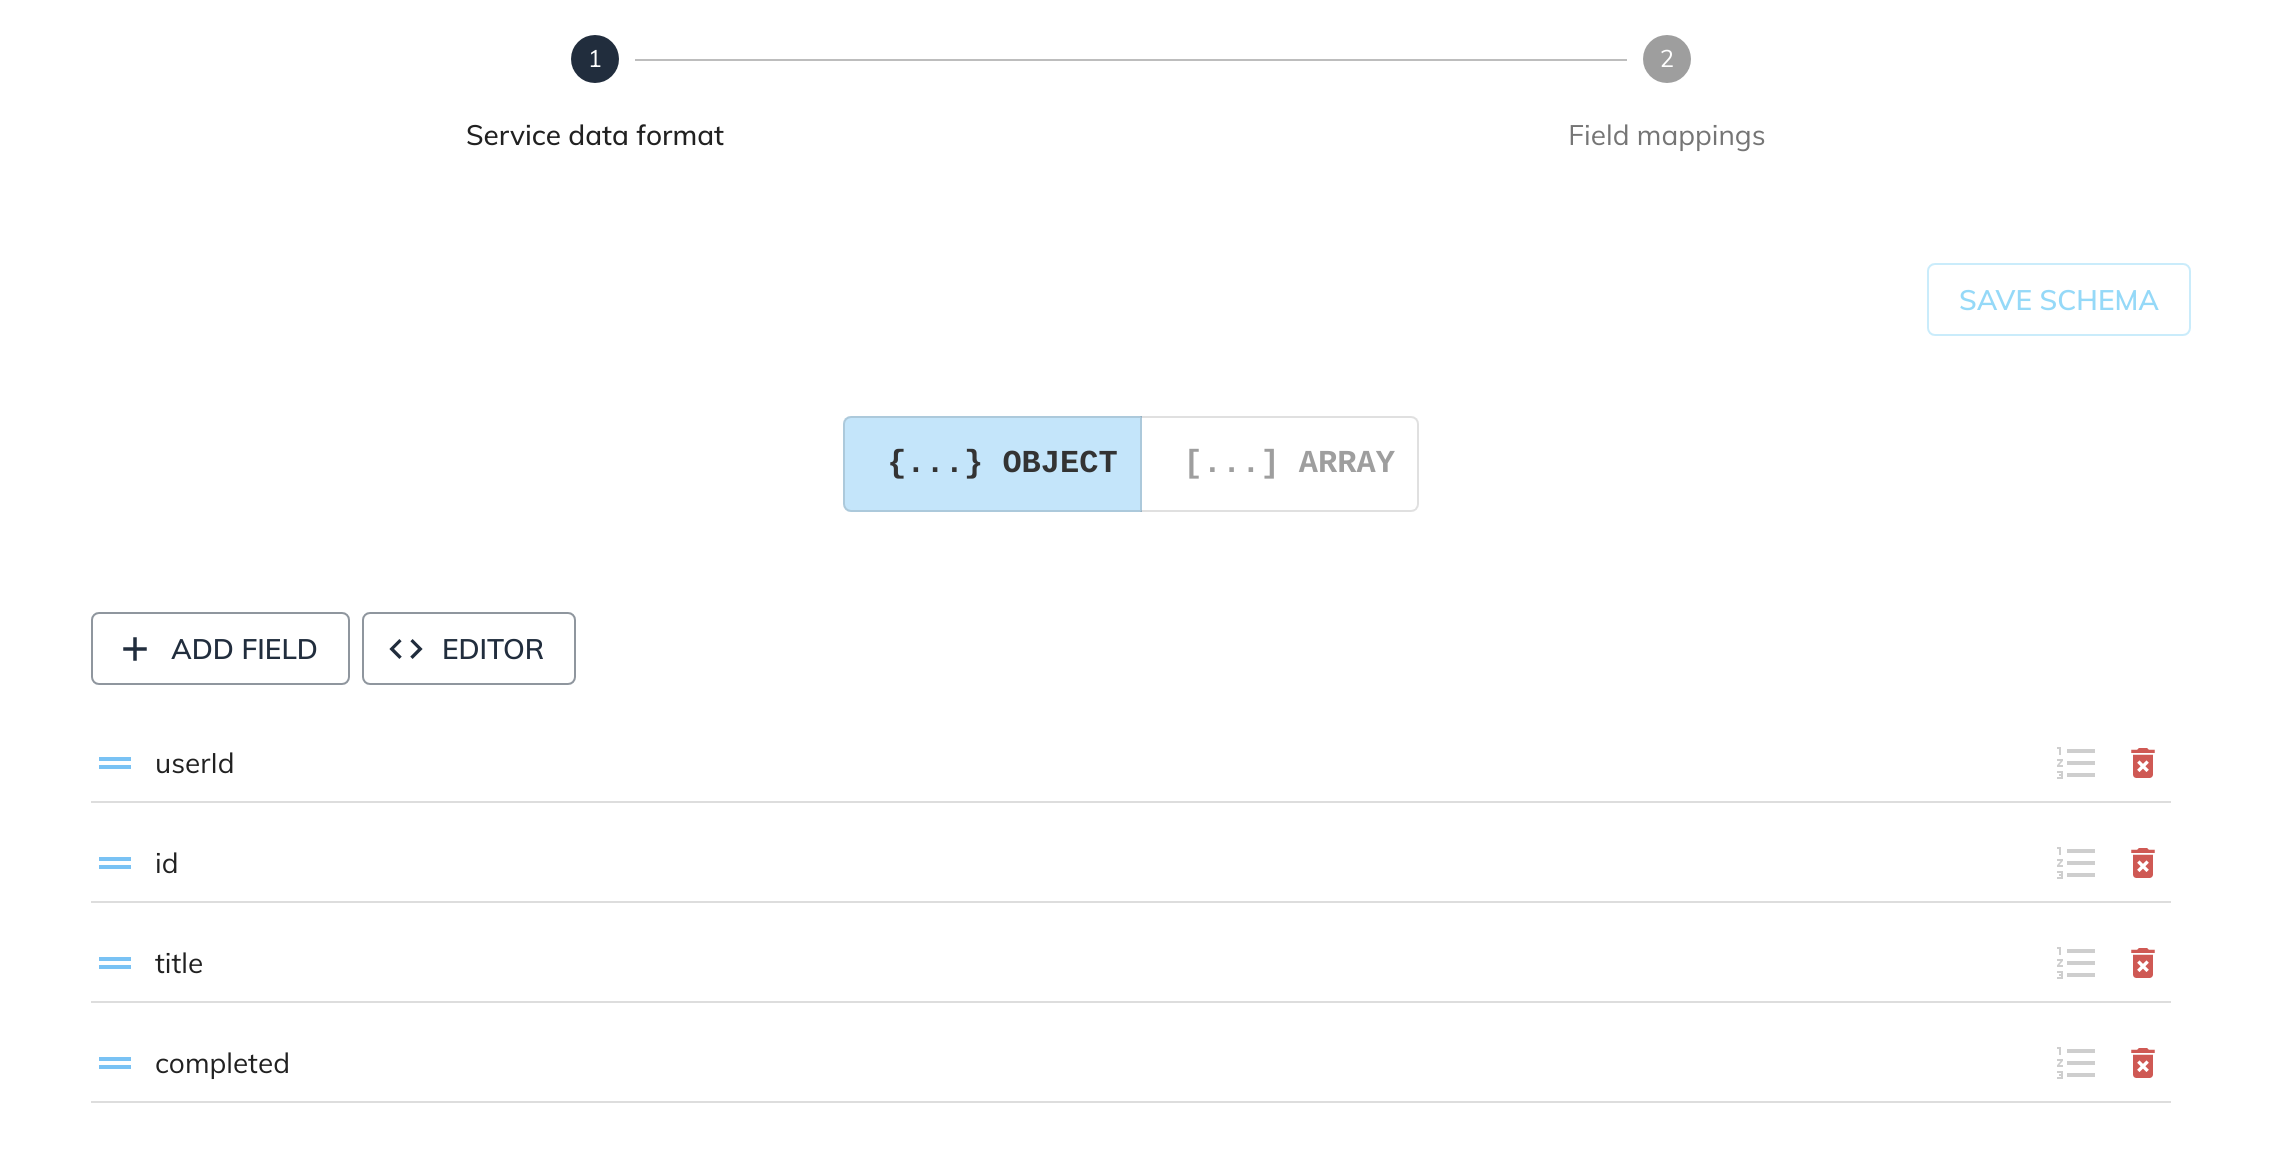
The schema can be whatever the resource excepts and for this example we are going to create an OBJECT schema with the specified fields:

Given the following source data from another service:
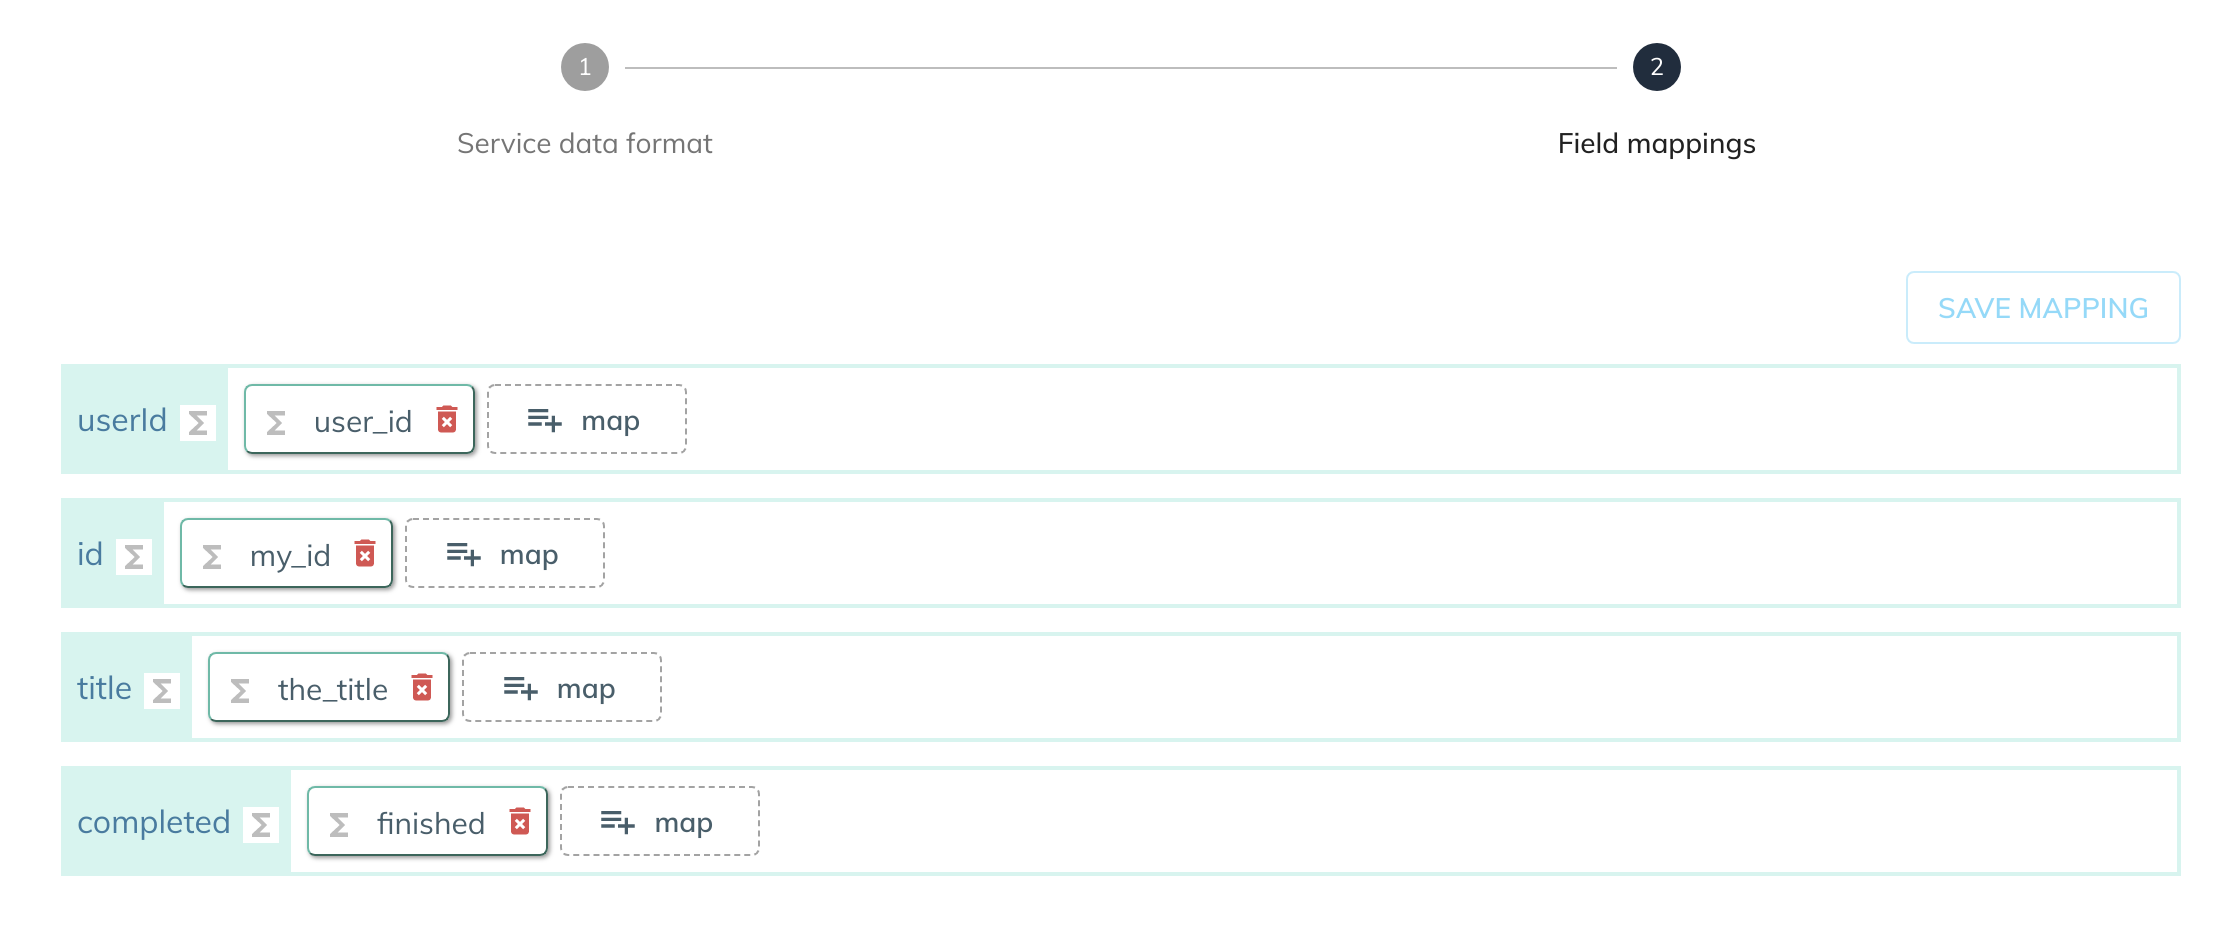
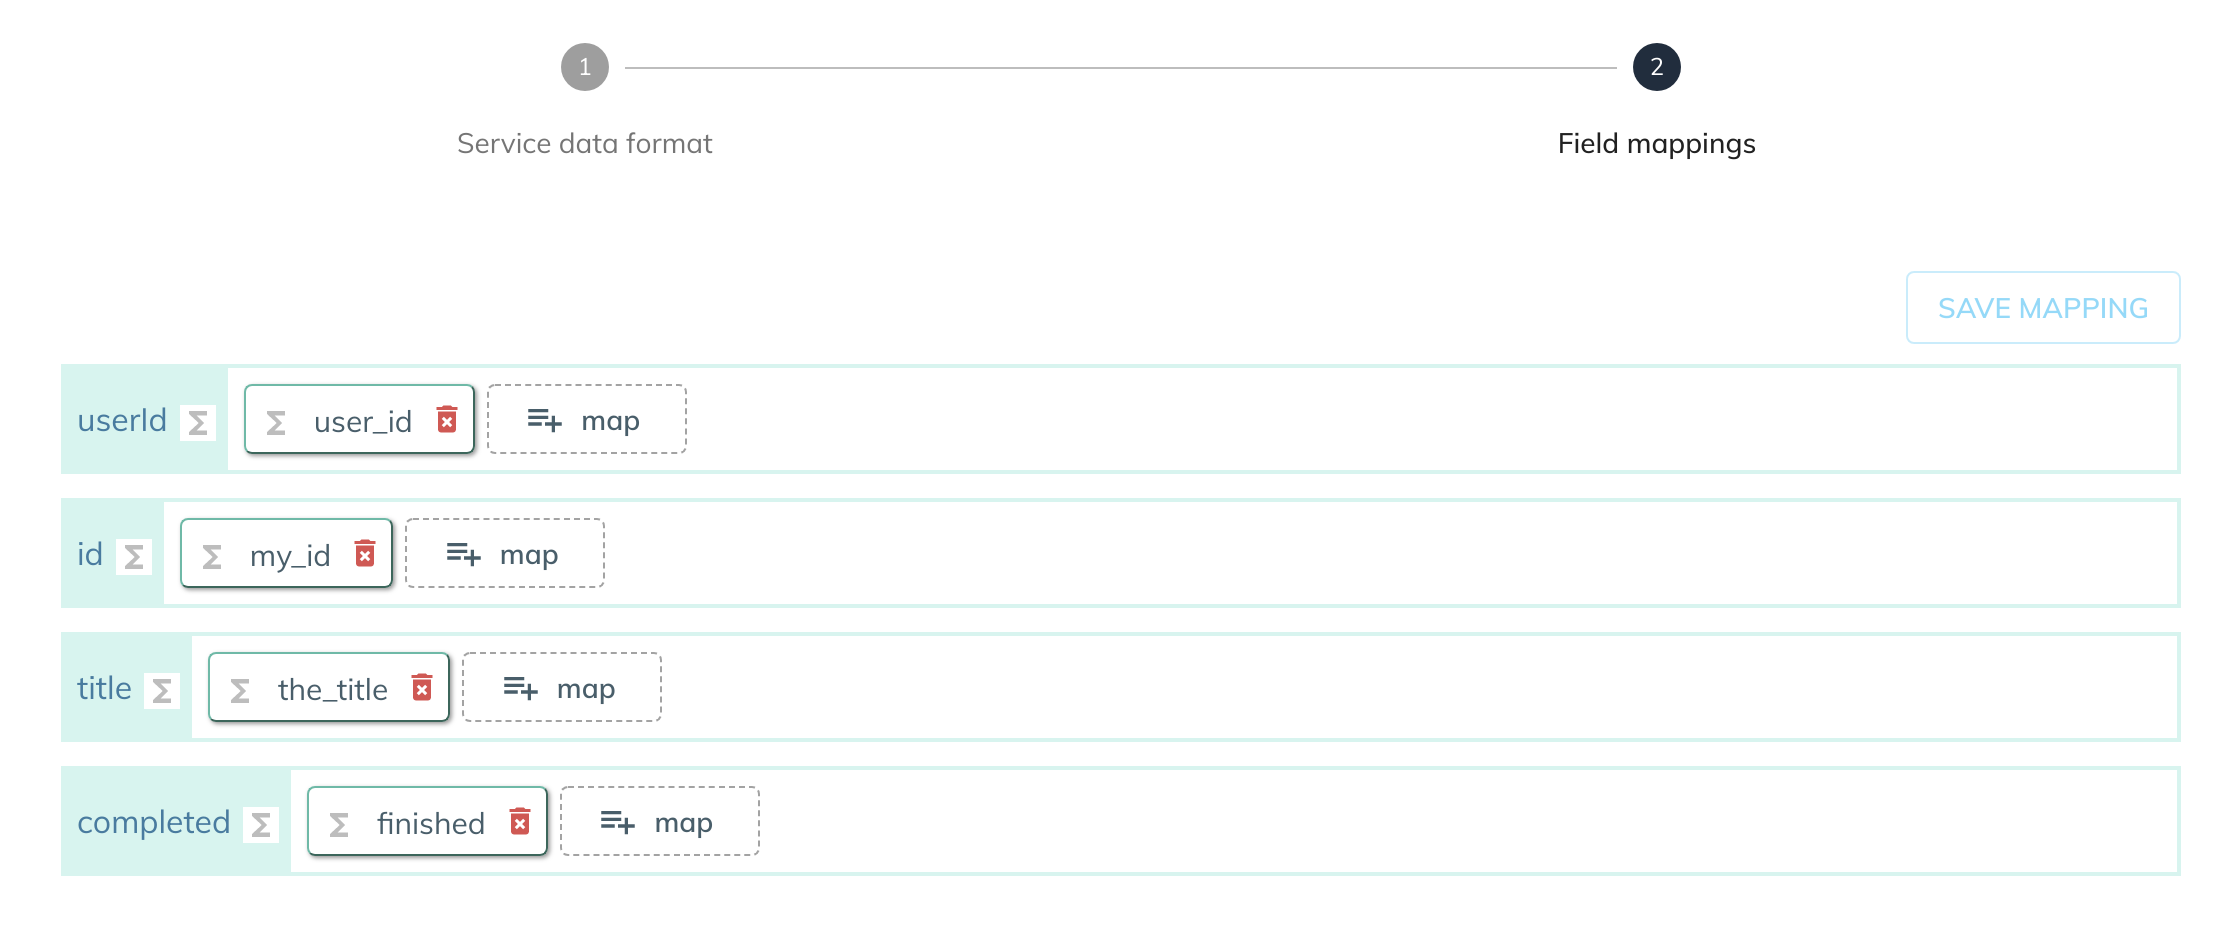
We can map the applicable fields with the schema object:

PUT
When the PUT configuration is selected the service will update a resource at a given location.
| Option | Description | Default | Required |
|---|---|---|---|
| Method | Select "put" to update a resource. | - | TRUE |
| API Url | The full URL of the resource . | - | TRUE |
| Headers | The request headers are not required as a request can be made without them. If added the Header Key and Header Value is required for each. | - | FALSE |
| Header Key | The name of the header key. | - | TRUE |
| Header Value | The value of the header. | - | TRUE |
Example configuration and mapping
The following example shows you how to configure the Rest Service to update a resource.

The schema can be whatever the resource excepts and for this example we are going to create an OBJECT schema with the specified fields:

Given the following source data from another service:
We can map the applicable fields with the schema object:

DELETE
When the DELETE configuration is selected the service will delete a resource from a given URL.
| Option | Description | Default | Required |
|---|---|---|---|
| Method | Select "delete" to delete a resource. | - | TRUE |
| API Url | The full URL of the resource . | - | TRUE |
| Headers | The request headers are not required as a request can be made without them. If added the Header Key and Header Value is required for each. | - | FALSE |
| Header Key | The name of the header key. | - | TRUE |
| Header Value | The value of the header. | - | TRUE |
Example configuration and mapping
The following example shows you how to configure the Rest Service to delete a resource:

The DELETE method doesn't require any service data setup.