Unleashed to woocommerce stock updater
Schedule-based integration (min. 1 minute interval)
Introduction
The Unleashed to WooCommerce Stock Updater integration template solves the issue of overselling online and eliminates any manual labour associated with keeping your inventory levels up to date and in sync between Unleashed Software and your WooCommerce online store.
In less than 5 minutes, you will be able to reap the benefits of this integration, saving you countless hours of manual labour each and every month and leaving you more time to focus on your business.
After a simple step-by-step wizard guiding you through the initial configuration, the Spojit platform gives you the ability to choose how often you would like to check Unleashed Software for any stock level updates, starting at one minute intervals. Once set, the platform will check for any updates to stock levels in Unleashed and seamlessly update your WooCommerce online store as per the schedule.
You stay in control of the integration link and have the ability to change the schedule as you see fit. Spojit gives you detailed logs each time the integration starts, giving you insight into the integration’s performance.
Instructions
1. Introduction
The following instructions outline what is needed to setup the Unleashed to WooCommerce stock updater. We will get API keys from Unleashed, create/get API keys from WooCommerce, add them both in Spojit, turn on the Legacy API in WooCommerce and then create a schedule to specify when the integration will run.
2. Unleashed Authorization
In order for the integration to be able to connect with Unleashed, API keys need to be copied from Unleashed into Spojit.
View steps...
1. Log in to your Unleashed account
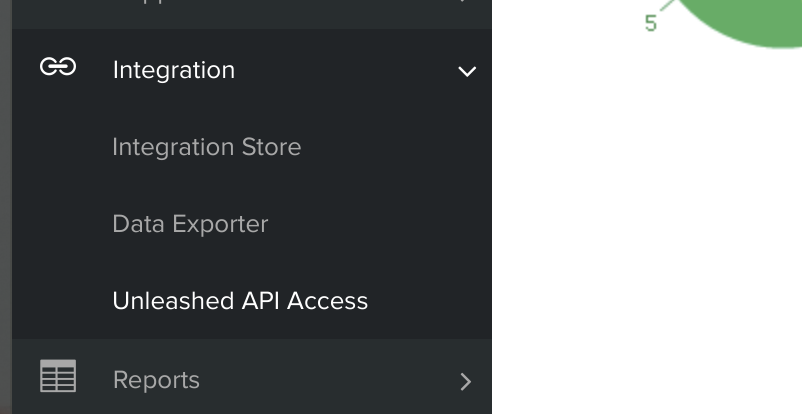
2. Navigate to Integration > Unleashed API Access
From the Unleashed dashboard click on “Integration” / “Unleashed API Access” from the side bar
3. Copy API Id and API Key
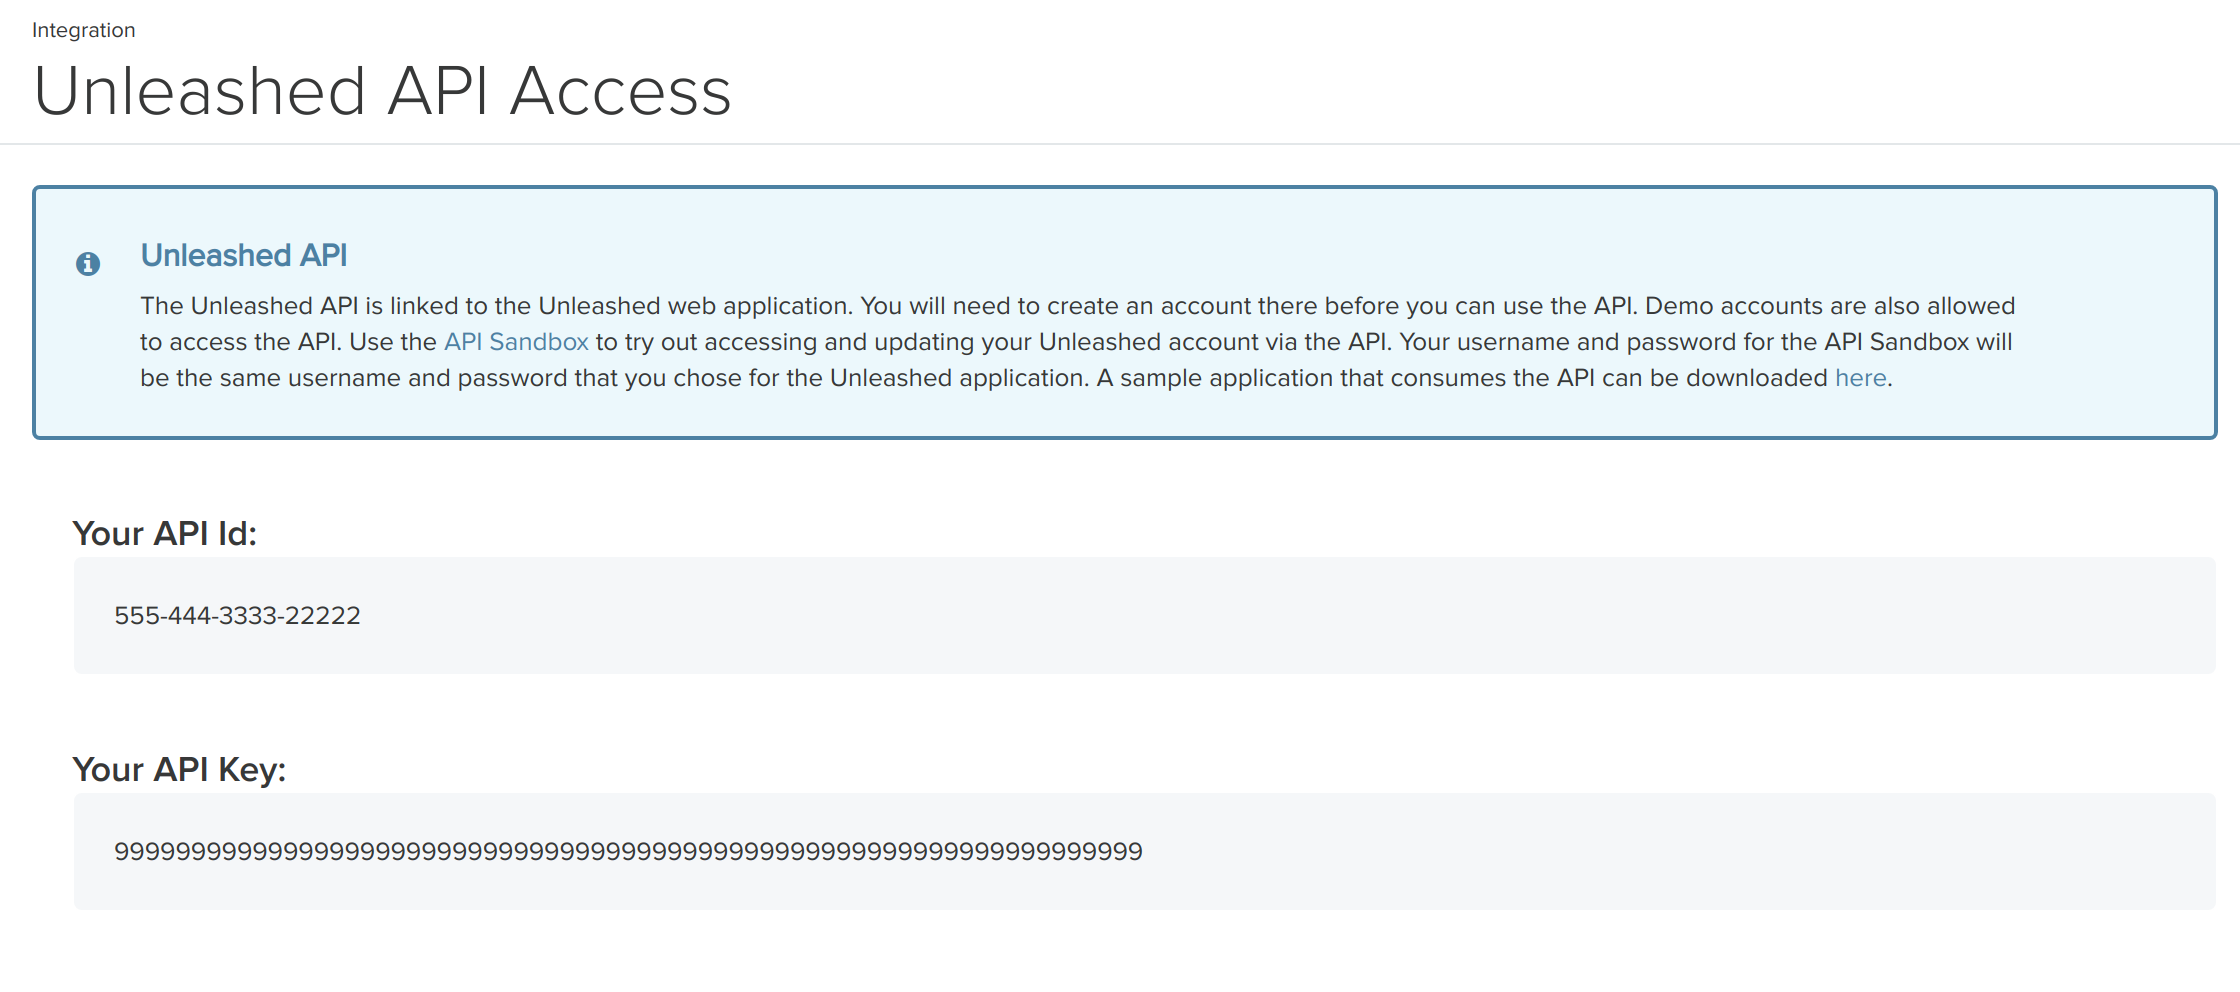
Copy the “API Id” and the “API Key” in the Unleashed API Access page. These API access credentials are used to link your Unleashed account with Spojit integrations utilizing the Unleashed connector.
3. WooCommerce Authorization
In order for the integration to be able to connect with WooCommerce, API Keys need to be generated and granted permission to read and write data from WooCommerce.
View steps...
1. Log in to your WooCommerce admin panel
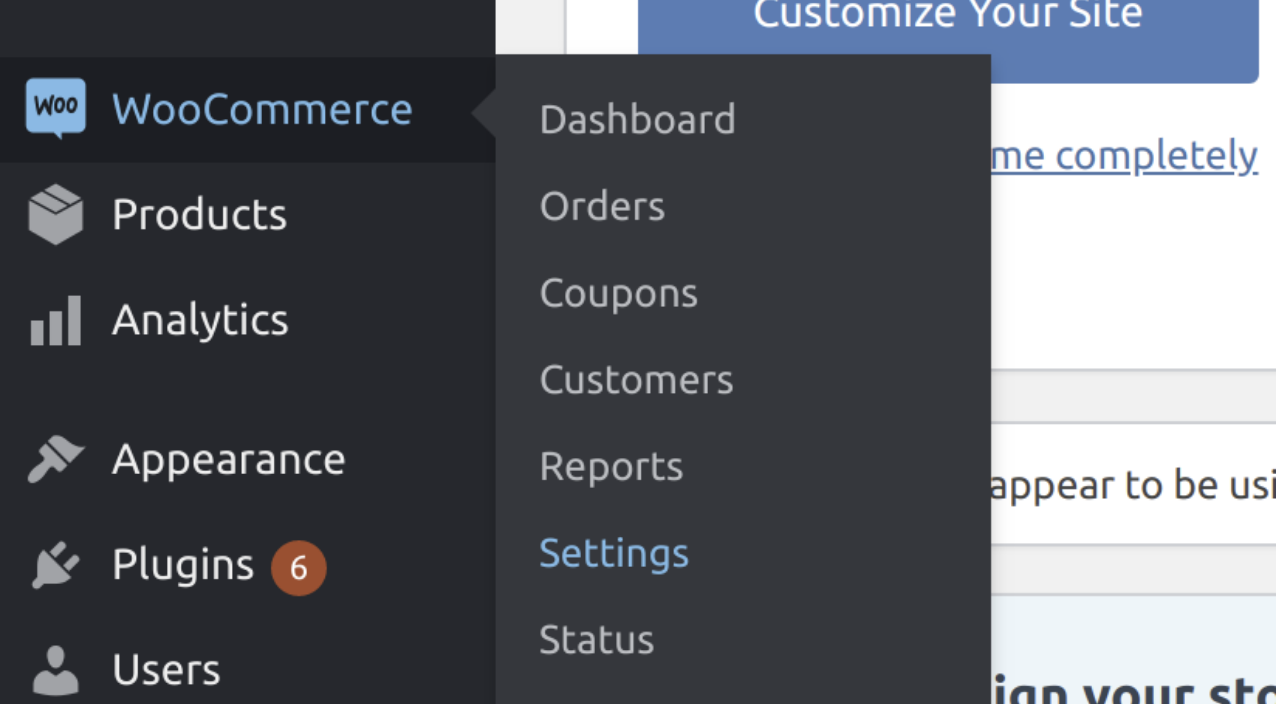
2. Navigate to WooCommerce > Settings
From the Wordpress Dashboard click on “WooCommerce” > “Settings” from the side bar
3. When in settings, click on “Advanced” and then “REST API”

4. Generate new API key
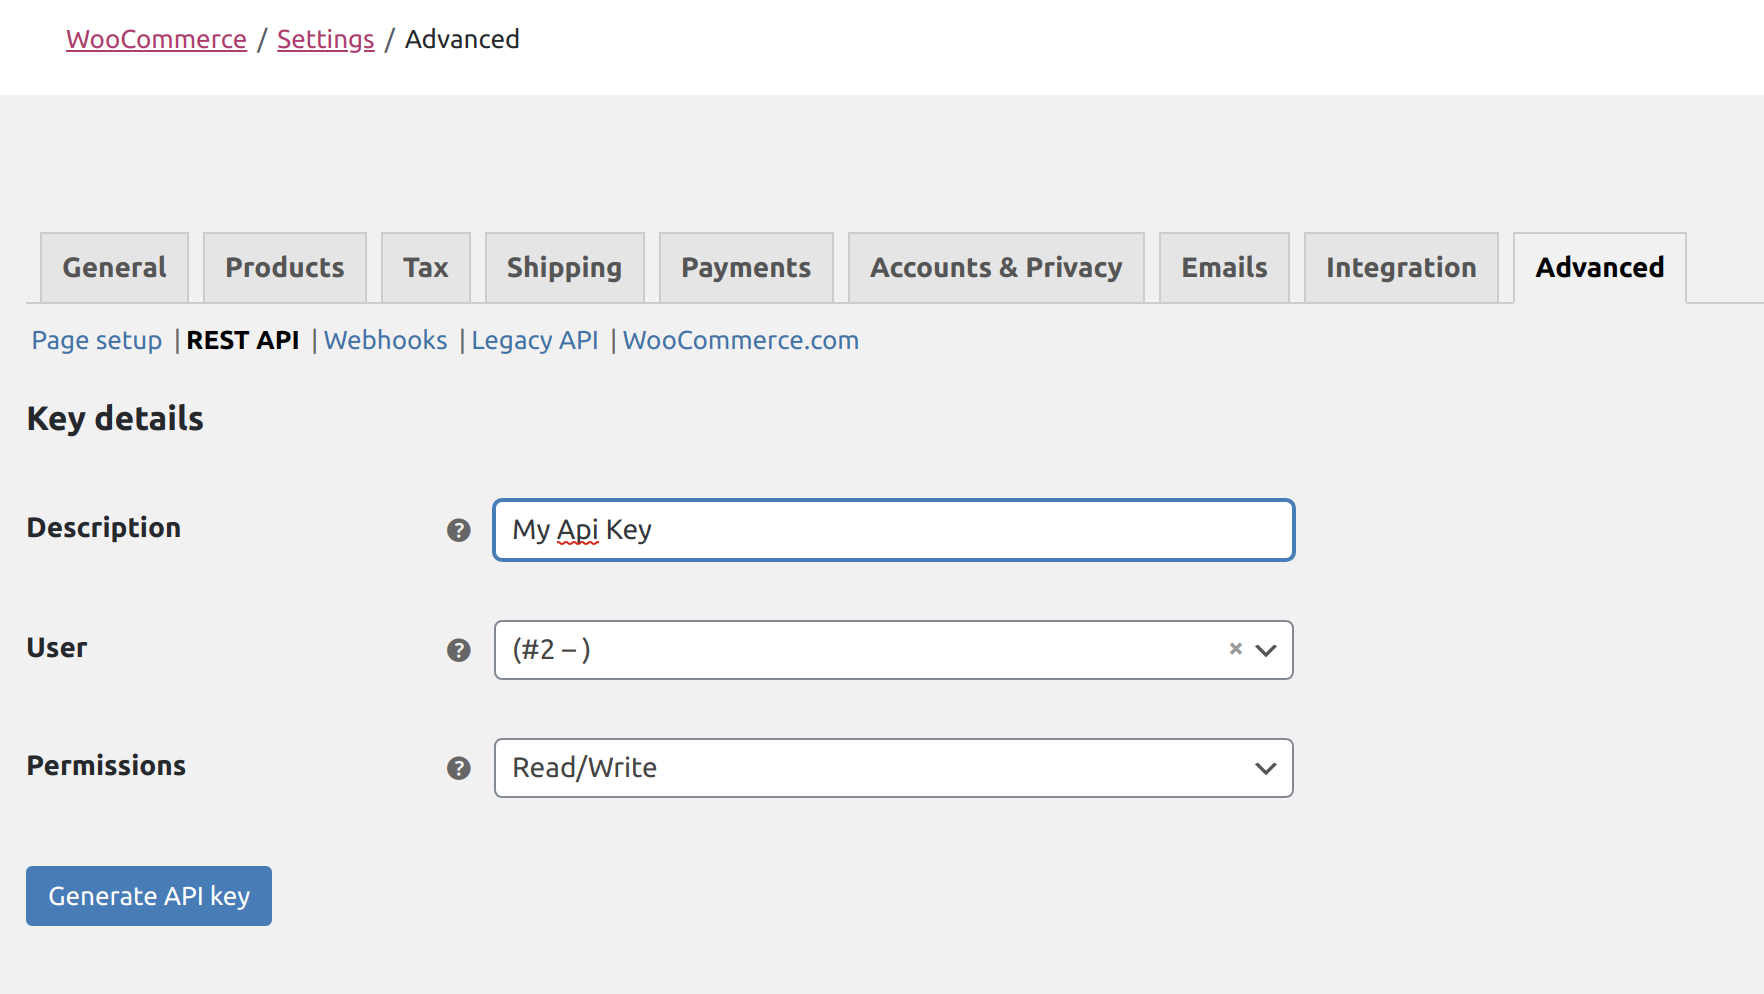
Click the 'Add key' button, add a name for the generated key, select a user to be assigned to the key, select “Read/Write” for the permissions and then click “Generate API Key”
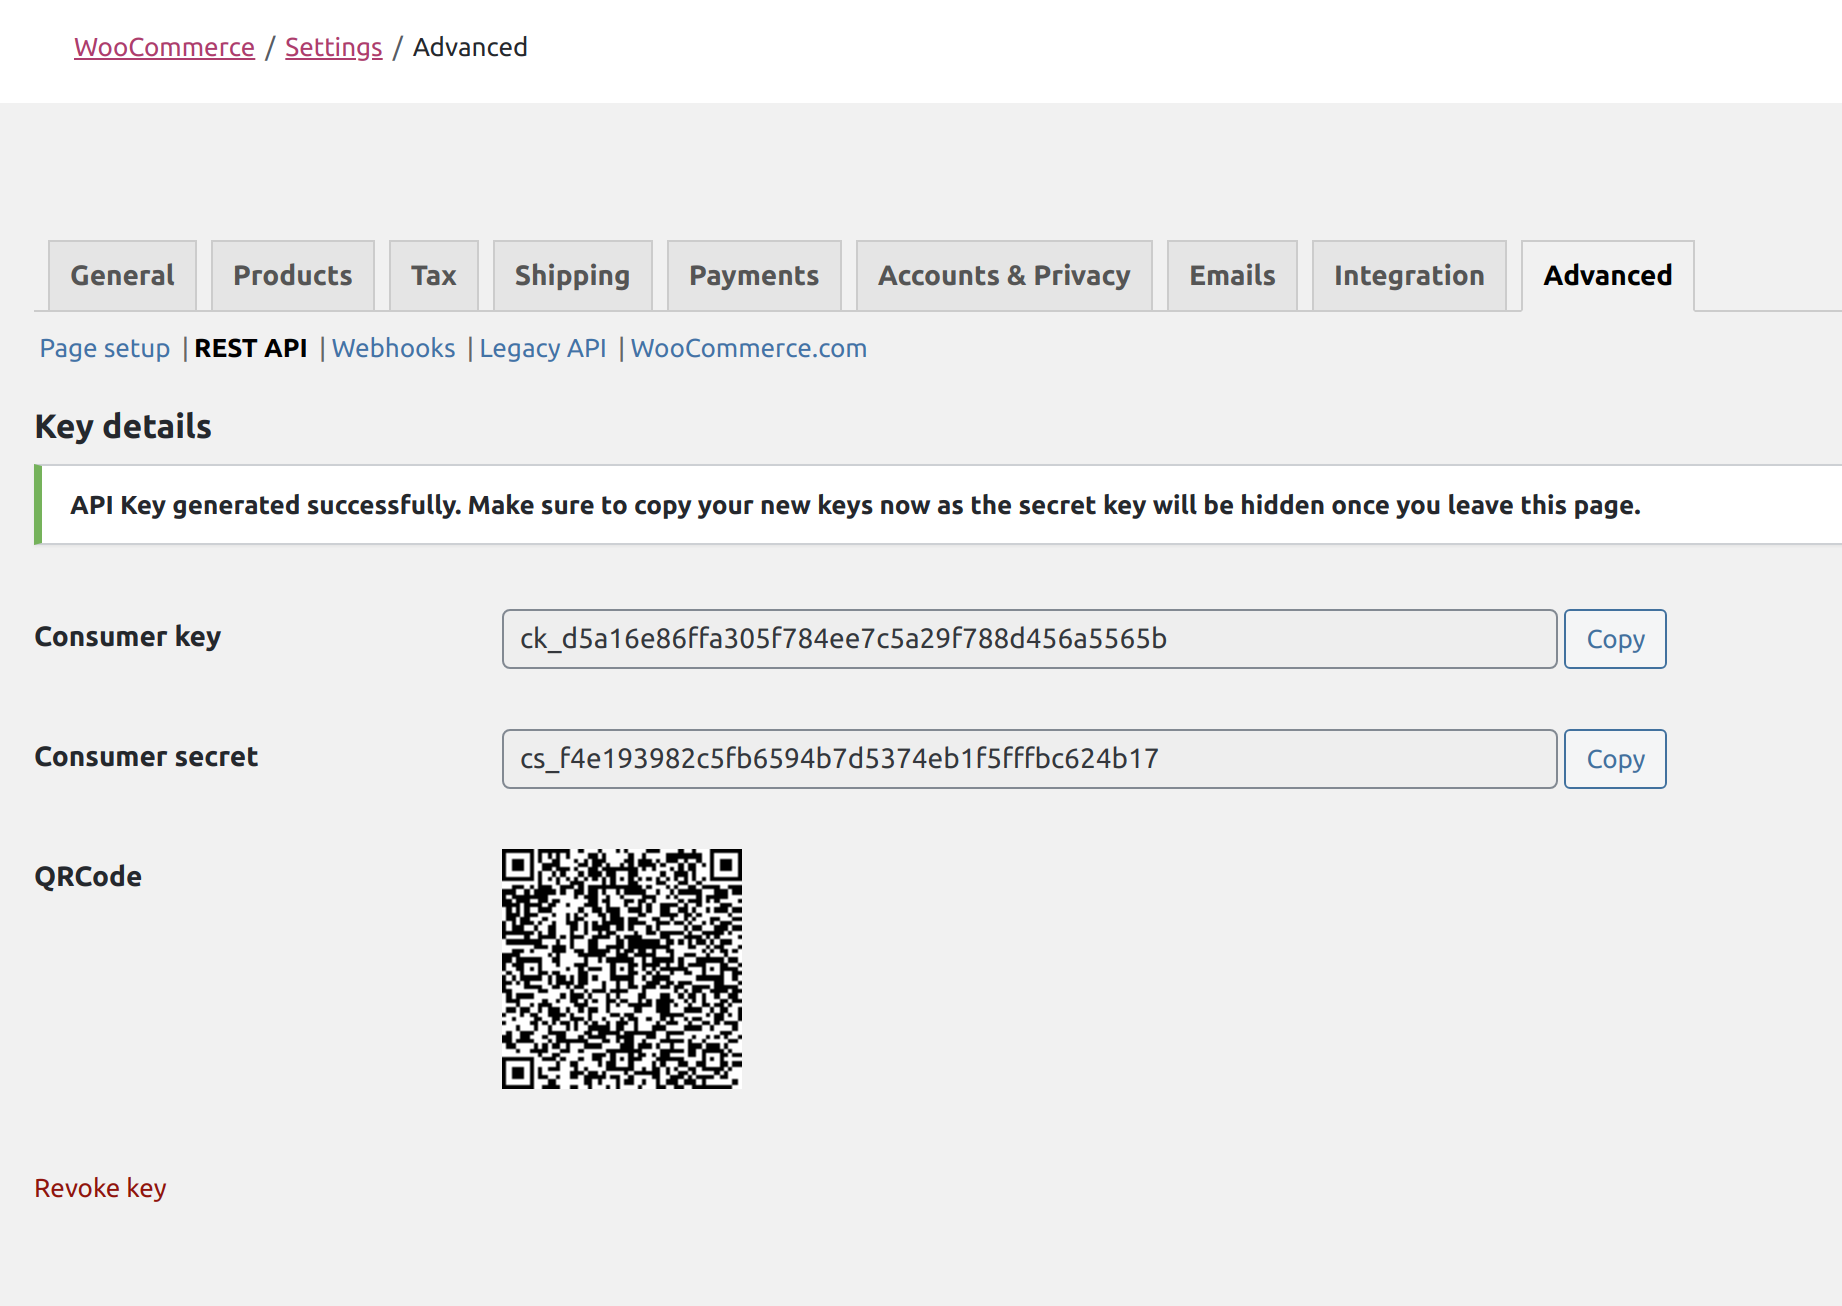
5. Copy generated API keys
Your keys should now be generated and will be displayed as follows (make sure you copy them at this stage otherwise you will not be able to see them again). Both the Consumer Key and Consumer Secret is required to authenticate WooCommerce in Spojit platform.
4. Enable Legacy Mode in WooCommerce
Because of the batch processing of the stock and its reliance on SKU data Legacy Mode needs to be enabled in WooCommerce to send batch stock updates with SKU and quantity values
View steps...
Solving common WooCommerce API Issues
If you are running into trouble while trying to connect your WooCommerce store via the REST API, you may want to review few technical notes on the most common issues and how to solve them in this blog post
1. Log in to your WooCommerce admin panel
2. Navigate to WooCommerce > Settings
From the Wordpress Dashboard click on “WooCommerce” > “Settings” from the side bar

3. When in settings, click on “Advanced” and then “Legacy API”
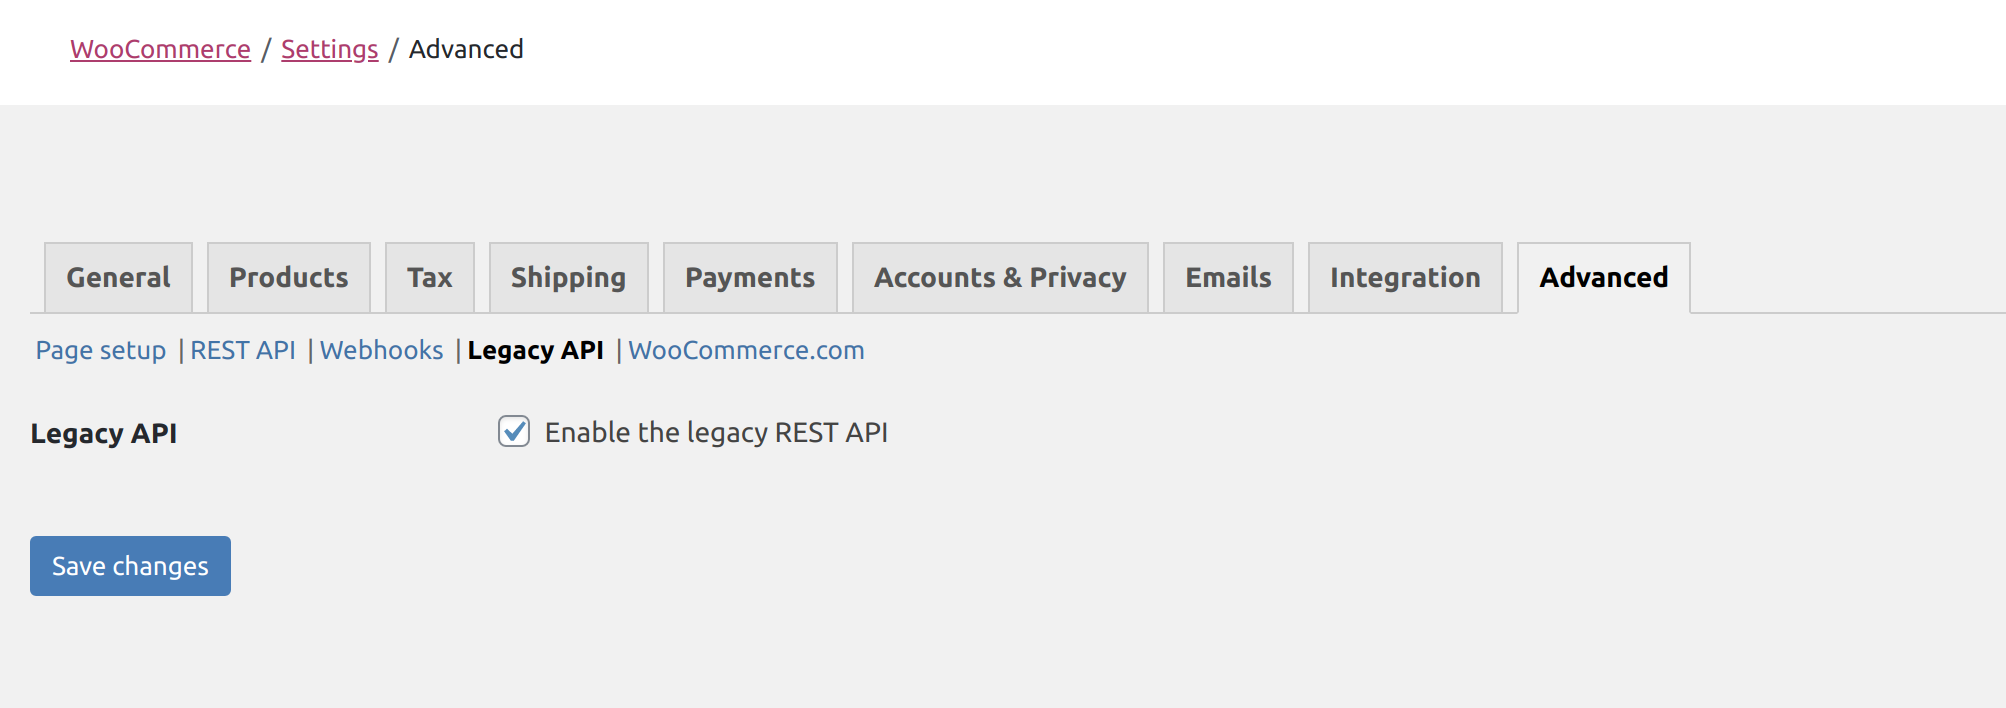
4. Enable Legacy API and save your changes
Click the checkbox to enable the Legacy API, and save your changes.
5. Set Schedule
Set a schedule to run this integration. Find out more in the Schedule section.